Integration Guide #
This section explains how to interconnect Penpot with other applications, so they can collaborate and create new kinds of features, or integrate in DesignOps or GitOps workflows.
The system is relatively simple for now, but expect more functions in the future.
Webhooks #
Outbound webhooks are event calls from Penpot to other applications, that notifiy some particular event has occured (e.g. a file has been created or updated, a comment has been added, etc.).
Webhooks managament #
In Penpot, webhooks are configured at Team level-
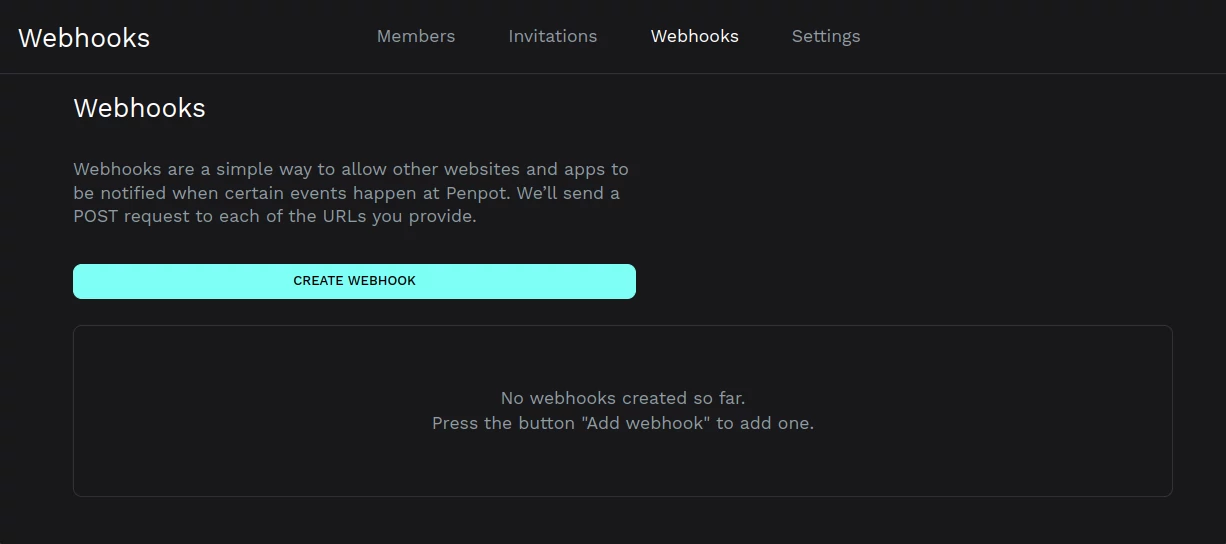
Add webhooks #
When you add a webhook, you specify the URL of a service you own. If the webhook
is active, a POST request will be sent to the URL on any event that occurs anywhere
in the team.
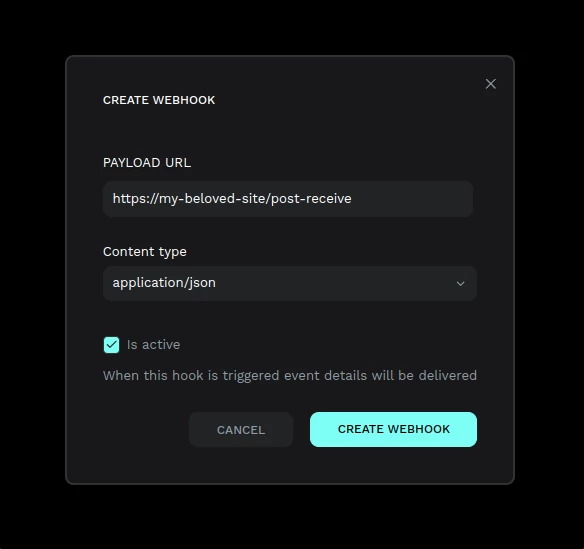
You can specify the format of the call payload.
- JSON is a standard format, accepted by almost every web application.
- Transit is a format, that may be encapsulated inside JSON, that adds datatype information and enriches the content with semantic information.
Events list #
Unfortunately, we do not have any specific documentation for the webhooks yet. For the moment you can use the backend API documentation, generated automatically from source code, as a guide.
All backend RPC calls labelled as WEBHOOK trigger webhook calls, if
appropriate, with an equivalent payload.
The payload content is specified as Clojure Spec predicates:
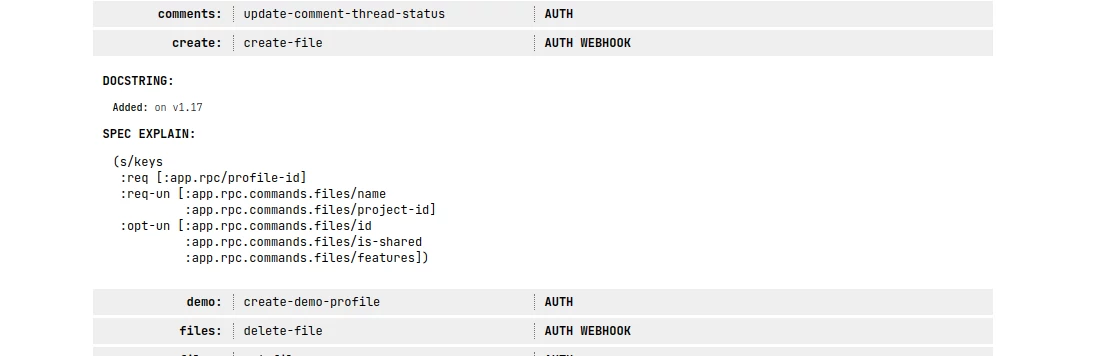
The listed spec details all required (:req or :req-un) and optional
(:opt-un) attributes of the RPC parameters.
The payload of the webhook is similar, but there may be some changes (some parameters ommited or others added). The recommended way of understanding the webhook calls is by using Webhook.site. Generate a site URL and set it into Penpot. Then you can inspect the calls received.
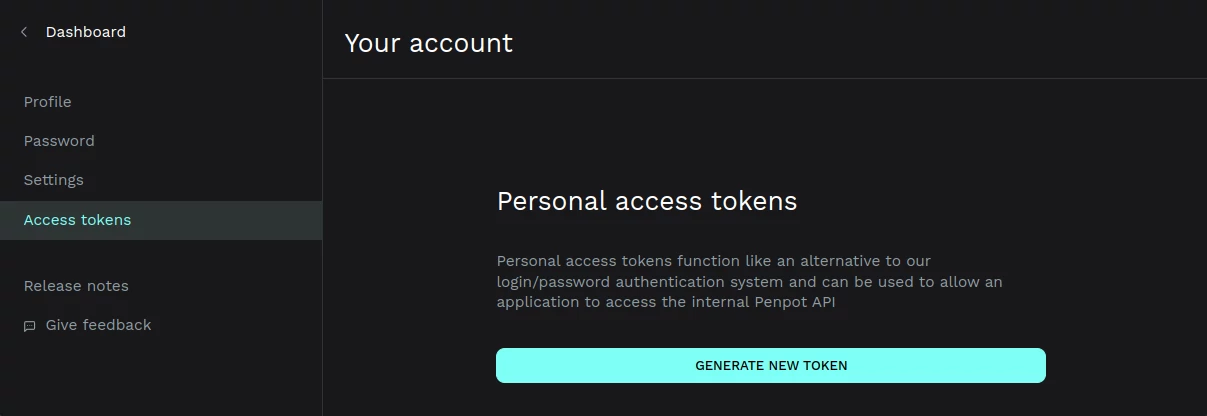
Access tokens #
Personal access tokens function like an alternative to our login/password authentication system and can be used to allow an application to access the internal Penpot API.
Important: Treat your access tokens like passwords as they provide access to our account.
Manage access tokens #
In Penpot, access tokens are configured at user account level. To manage your access tokens, go to Your account > Access tokens.
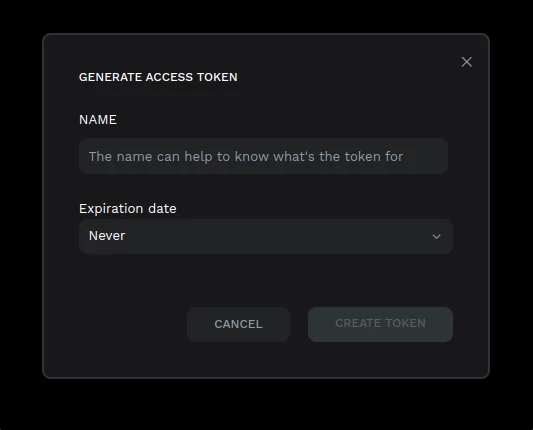
Generate access tokens #
- Press the "Generate new token" button.
-
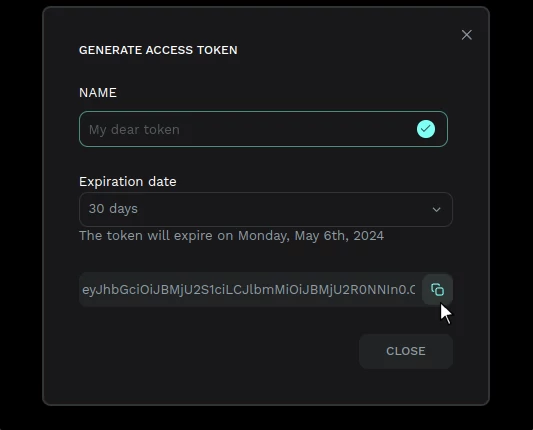
Fill the name of the token. Descriptive names are recommended.
-
Choose an expiration date. Current options are: Never, 30 days, 60 days, 90 days or 180 days.
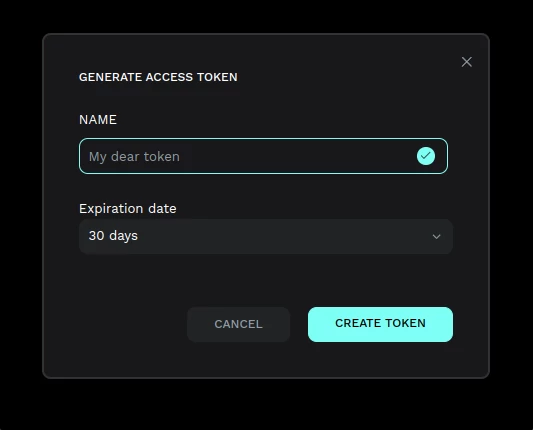
- Once you're happy with the name and the expiration date, press "Create token". At this step you will be able to copy the token to your clipboard.
Delete access tokens #
You can delete tokens anytime. You'll find the option at the menu at the right side of each token of the tokens list.
Using access tokens #
Having a personal token will allow you to use it instead of your password.
This is an example of a curl command that you can run at the console to access your Penpot profile using an access token:
curl -H "Authorization: Token <replace-this-with-token>" https://design.penpot.app/api/rpc/command/get-profile