Workspace basics
The Workspace is where you create designs. You have an infinite canvas where you can directly work but you also have the ability to create pages and boards that will help you to create exportable components.
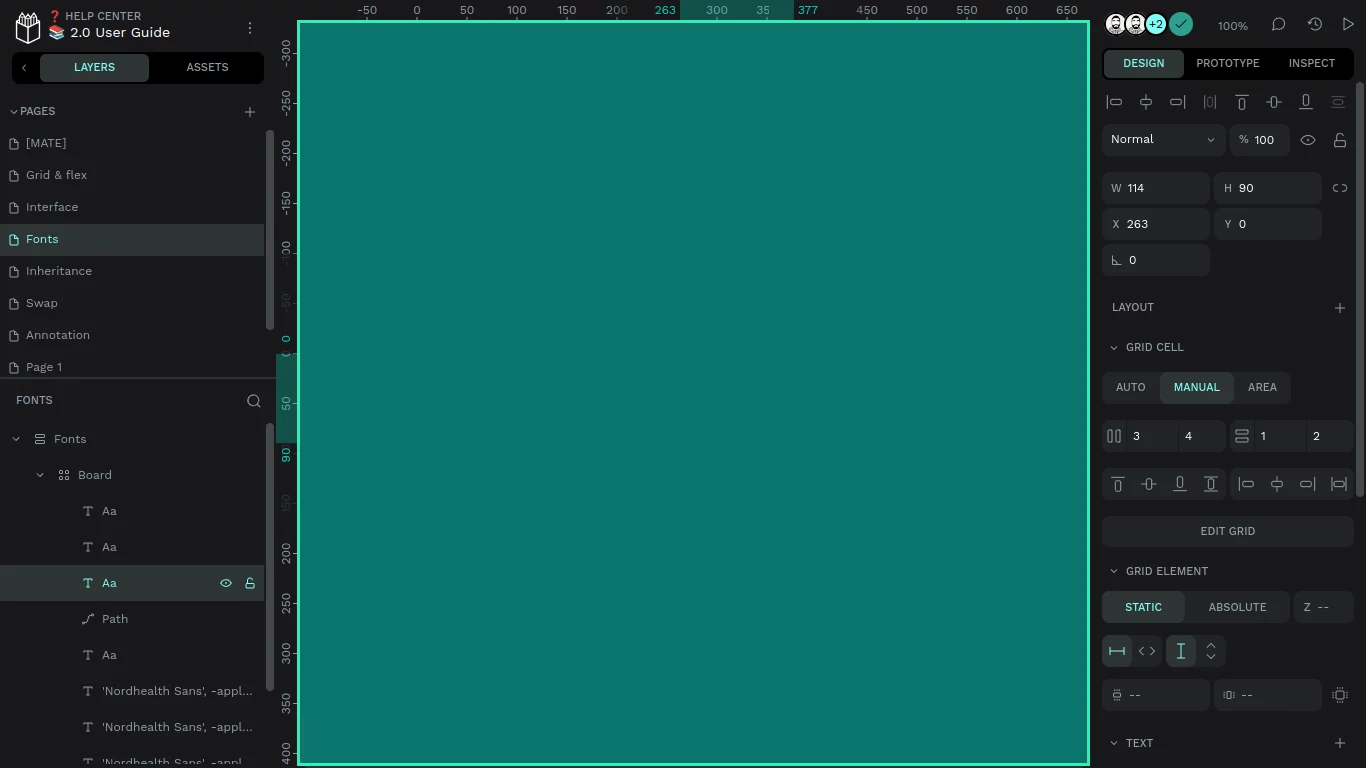
The viewport
Surrounded by panels, header and toolbars, in the middle of the workspace, you can find the viewport. The viewport is the design area of a file page. It is practically infinite. If what you need is a frame with specific, limited dimensions, you can create a board.
Moving around the viewport
Press space and drag to pan (move around the viewport). If you are using a trackpad you can do two finger scrolling.
You can also use the scrollbars, which are specially useful for those who love using graphic tablets.
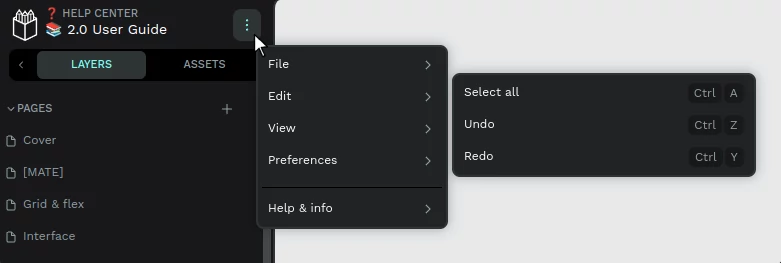
The menu
There's a main menu at the workspace where you will find groups with all the actions that you can do at file level. File, View, Edit, Preferences and Help.
Layers panel
Every layer you create in Penpot’s viewport is a layer. Rectangles, ellipses, boards or text boxes are layers that you can use to build your design.
Pages
Pages allow you to organize layers into separate sections inside a file, and are shown in separate tabs. Subdividing a file into pages gives you the ability to split your file into logically different sections so that you can organise your work. For instance, you can use pages to separate stages of the design process but keep them in the same document. Different screen sizes, features or atomic design categories are other common ways to use pages.
You can add, remove or rename pages to suit your needs.
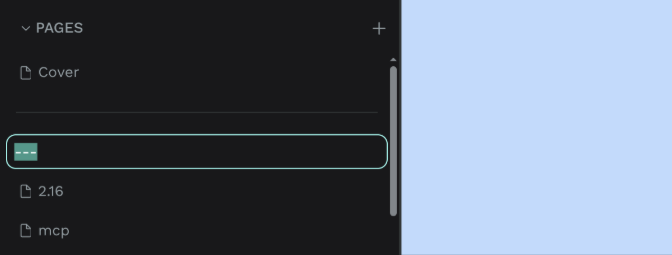
Page separators
You can add visual dividers in the page list to group pages without extra structure. Create an empty page, then rename it to ---. The page appears as a horizontal line in the list.
A page only becomes a separator if its name is --- and the page has no content on the canvas. A page with content that is named --- stays a normal page. Separators cannot be opened or selected; you can reorder or delete them like other pages.
If you rename the active page to ---, Penpot navigates to another page in the file. Double-click a separator to rename it; clearing the name and confirming removes the separator page.
Layers
Layers: Layers are the different objects that you can place at the design viewport. At the layers panel you can see all the layers of a file page. Drag the layers to arrange them to different positions.
Navigate layers using the keyboard
- Select a layer and press top/bottom arrows while pressing Ctrl/⌘ to move them in the layers list.
- Press Tab to change the layer selection to the next layer.
- Press Tab + Shift/⇧ to change the layer selection to the previous layer.
- While renaming a layer in the Layers panel, press Tab to save the name and start renaming the next layer below, or Shift/⇧ + Tab for the layer above (siblings in the same group).
- If the layer contains other layers, press Enter to select the first layer inside the group and Enter + Shift/⇧ to move a level up.
Layers are displayed from the bottom to the top of the layer stack, with layers above on the stack being shown on top in the image.
Search and filter layers
Reach specific layers with a simple search. You can also filter the layers list per layer type (board, group, mask, component, text, image and shape).
Find and replace
Open Find and Replace from the main menu (Edit) or press Ctrl/⌘ + H. The search bar at the top of the Layers panel expands with a replace field.
- Search on canvas: finds text inside text layers on the current page.
- Search layers: finds layer names on the current page.
Search is not case sensitive and does not support regular expressions. Layer type filters still apply, so you can narrow matches before replacing.
Use Replace for the current match or Replace all for every match on the page. Arrow buttons move between matches.
You can also open Find from the main menu or press Ctrl/⌘ + F to search without the replace field.
Collapse groups and boards
Groups and boards can have their contents expanded and collapsed. Click on the arrow at the right side to toggle the visibility of their contents.
To collapse all the layers, and just display the boards, press Shift/⇧ + left click over the right arrow of a group or a board to collapse them all.
To expand the entire subtree of a collapsed group or board, press Alt/⌥ + click its disclosure arrow.
Numeric inputs in the Design sidebar
Many numeric fields in the Design sidebar support scrubbing: click and drag on the field to change the value. Hold Shift/⇧ to change the value ten times faster.
Drag-to-change is not available when a design token is applied to that field.
Focus mode
Focus mode zooms into the elements of a page you want to work with in a specific moment, and hides the rest so that they don’t get in the way. When the page has many elements, focus mode can also improve performance.
To activate focus mode:
- Select one or more elements.
- Right click on the selection to show the menu and select the option “Focus on” or press F.
Notice that the layer panel will now only show the focused layers. A focus mode status line will also appear at the top.
To exit focus mode and return to the original viewport and selection, right click anywhere and select “Focus off” or just press F again. You can also click anywhere on the focus mode status line at the top of the layer panel.
Zoom
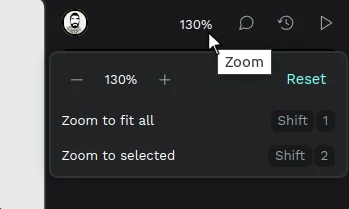
Zoom menu
To zoom in and out hold Ctrl (or ⌘ if using macOS) and use the scroll wheel on your mouse. You also have a bunch of useful shortcuts for the most common zoom levels that you can find at the zoom menu in the navigation bar.
Zoom lense
Press left click while pressing Z to zoom in to a specific point and Alt/⌥ + Z to zoom out.
Zooming from the layers panel
Double click over a layer icon to zoom to the layer.
Comments
Comments allow the team to have one priceless conversation getting and providing feedback right over the designs and prototypes.
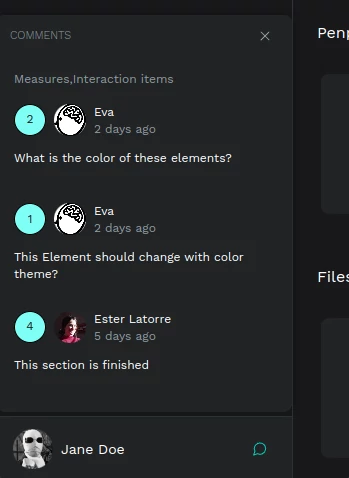
Adding comments
- At the workspace, activate the comment tool by clicking the comment icon in the navbar or pressing the C key.
- Click on a location within the viewport to leave a comment. If you want the comment to appear in the board view, add the comment to the board.
- Write your comment in the text box.
- Press Post to leave the comment or Cancel to not do it.
Comment bubbles stay visible on the canvas while you design. You can reply to, edit, and manage threads without staying in Comments mode.
Use View → Hide comments or View → Show comments (after Lock guides) to toggle comment bubbles on the canvas. You can also press Ctrl+Shift+C (Cmd+Shift+C on macOS). This preference is saved in your user settings.
Press C or the comment button to enter Comments mode when you want to add a new comment on the canvas. Comments mode still works as before and shows comments if they were hidden.
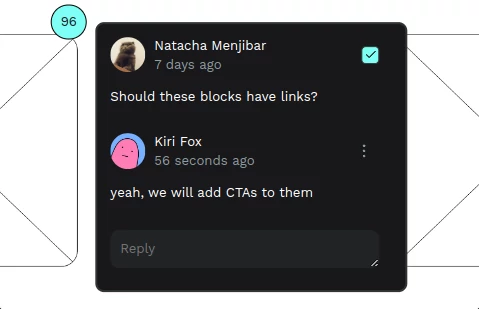
URLs in comments are detected automatically and open in a new browser tab when clicked.
How to reply a comment
- Open a comment by clicking at its bubble (a circled number).
- Write your comment at the text box at the end of the comment popup.
- Press Post to leave the comment or Cancel to not do it.
Mark threads as read
Mark a thread as read using the checkbox at the comment box to make it disappear from the comments notifications at the dashboard.
Edit and remove comments
At the top right of the comment popup you can find options to edit or delete comments.
Dashboard notifications
At your projects Dashboard you will be able to see if you have unread comments inside the files of the team.
File history versions
The history panel keeps track of the latest changes on an opened file as well as the different versions of the file, making it easier to track changes, revert to previous states and collaborate.
View history
To view the recent history of a file at the workspace click the history icon on the navbar at the left:
- To see the history of file versions go to the History tab.
- To see the history of item changes go to the Actions tab.

History panel
At the History panel, you can save the current version of your file, as well as access previous versions for up to 7 days.
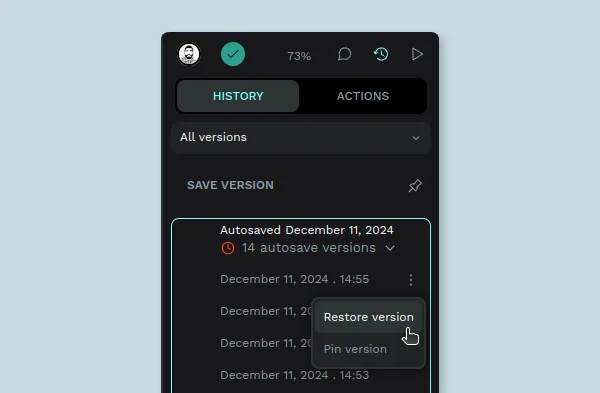
Restore versions
All saved versions of the file—whether manually saved, autosaved, or pinned—can be restored, reverting the file back to its state at the selected time.
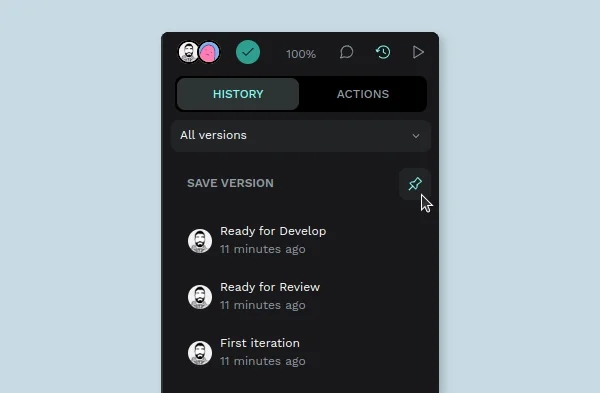
Saved versions
You can save the current version of your file by clicking the pin icon at the History tab. This will allow the version to be named and it will add it to your list of versions.
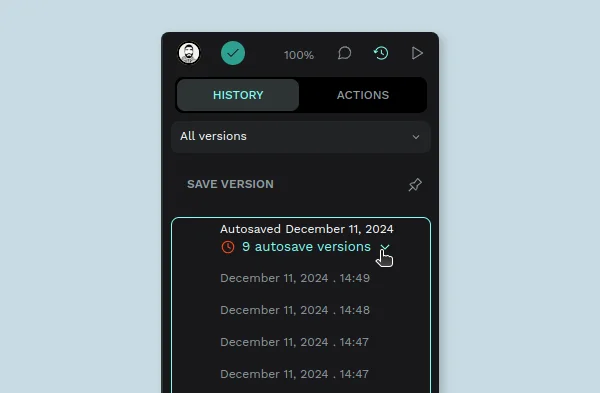
Autosaved versions
When you start working on a file, Penpot will start to automatically save versions of that file across time so that you can later restore them as needed.
In the History tab, if you click on the autosaved versions, you’ll see a list of the exact date and time when the version was automatically saved.
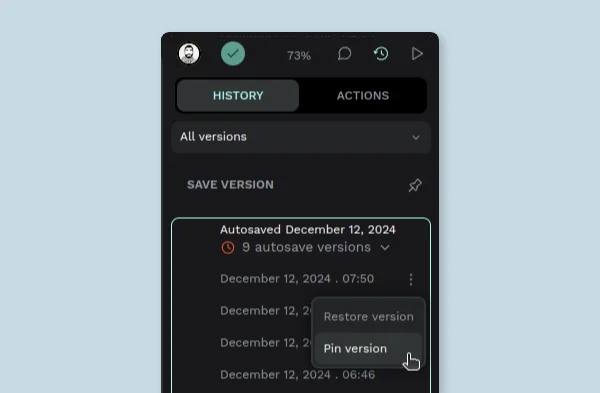
Pinned versions
File versions can also be pinned. Pinning a file version will allow you to name it, making it easier to access at the History tab. Pinned file versions will be saved forever and can be renamed, restored or deleted at any time.
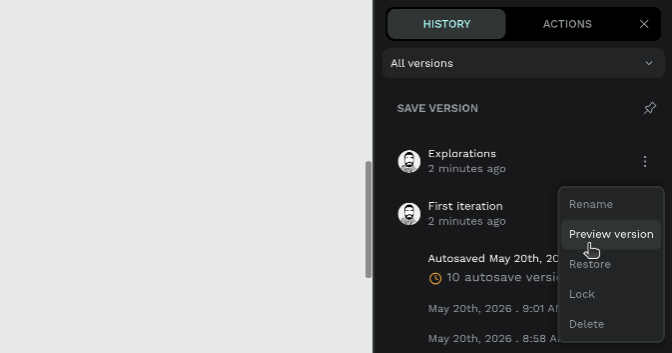
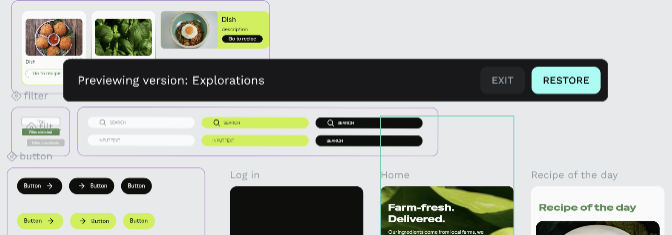
Preview a saved version
Open the version menu in the History tab and choose Preview version. The workspace opens in view-only mode: a banner shows the version name, and the Pages panel displays a View only badge.
You can inspect the design but not edit it. Use Exit in the banner to leave preview, or Restore to revert the file to that version.
Actions panel
At the Actions panel, you have the layer type (rectangle, text, image...) and type of change (New, Modified, Deleted...). If you press the item, it will be reverted to its state before that specific action was performed.
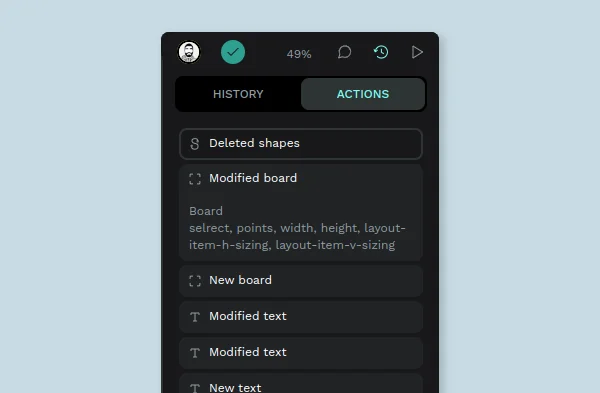
The Actions panel shows only a limited list of changes at a current browser tab session. Refreshing the browser means refreshing the history of actions as well.
Navigate actions
To navigate through the actions press Ctrl/⌘ + Z to go backwards and Ctrl/⌘ + Shift/⇧ + Z to go forward.
You can also press any item of the actions list to get to this specific state.
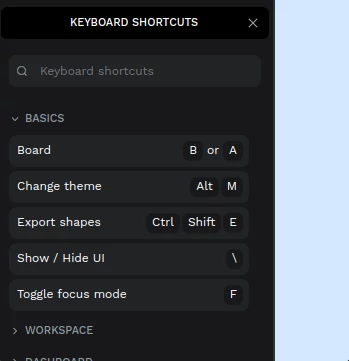
Shortcuts panel
Shortcuts boost your productivity but they are not easy to learn. A handy panel at your workspace will help you with that.
Display the shortcuts panel at the workspace using the shortcut ? or through the option at the main menu.
The categories and a filter will help you to find the shortcut you need.
Dynamic alignment
While moving layers at the viewport Penpot will show alignment guides for the edges and the center of the layers at sight. Dynamic alignment also snaps the layer that is being moved to those guides to help you align to the center of the edges of other layers.
If there are more than two layers nearby and you drag one of them Penpot will show their distance to help you distribute them equally.
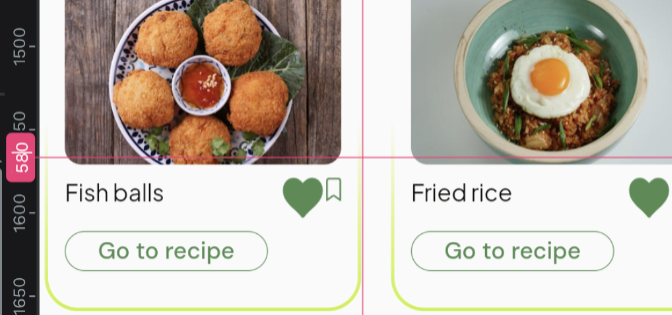
Rulers
Penpot has rulers that measure in pixels.
Ruler guides
To create ruler guides click anywhere on the ruler an drag to some point of the viewport. Click on the vertical ruler to create a vertical guide and the horizontal ruler to you know what.
To set an exact position, double-click the guide pill on the ruler and type a value.
Right-click a ruler guide to change its color from the preset swatches.
To delete ruler guides drag the guide to the ruler or select the guide and press delete / supr.
To show/hide ruler guides use the same shortcut as for rulers: Shift/CMD + Ctrl + R
Guides
Guides are design aids that are used to help you to align content to a geometric structure. In Penpot there are three types of guides: square, columns and rows.
Note: Guides are only visible in the viewport and will never be shown on exports.
Add guides
Guides can be added at board level. With a board selected, in the design sidebar you'll find the section "Guides". Click the "+" button to add a guide to the selected board. You can add as many guides as you want.
Hide and remove guides
You can hide a specific guide by clicking at the eye button of a guide configuration. If you want to remove a guide, use the "-" button at the right side of the guide settings.
Square guides
The options for square guides are:
- Size (in pixels)
- Color
- Opacity
Row guides
The options for row guides are:
- Rows
- Type - stretch, top, center bottom
- Height - "auto" by default.
- Gutter - the space between each row.
- Margin
- Color
- Opacity
Column guides
The options for column guides are:
- Columns
- Type - stretch, top, center bottom
- Width - "auto" by default.
- Gutter - the space between each column.
- Margin
- Color
- Opacity
Guides defaults
The first guides configuration (type, color, sizes...) that you get when adding guides is the default for each file guides.
- Restore the properties of guides to the default by using the "Use default" button.
- Change the default settings to the ones of a guide by using the "Set as default" button.
Guides visibility
To hide or show all the guides at a file you can press Ctrl/⌘ + ´ or use the option at the main menu at the top left of the navbar.
Snap to guides
If you want to enable or disable the snapping to guides you can press Shift/⇧ + Ctrl/⌘ + ´ or use the option at the main menu at the top left of the navbar.
Snap to pixel
Layers automatically snap to the pixel grid. If you need a different kind of precision like working at subpixel level using measures with decimals you can disable this option anytime from the main menu.
When the pixel grid is visible, you can customize its color from the main menu (View).

Nudge amount
Set your chosen distance to move layers using the keyboard. This is a must if you’re working with guides (if you’re not, you should ;)). Being able to adjust the movement to your baseline grid (8px? 5px?) is a huge timesaver that will improve your quality of life while designing.

To adjust the nudge values (small and big), you can find the option at the main menu inside Preferences.
